Showing posts with label steampunk. Show all posts

Tuesday, February 21, 2012

Dapper Hoppers

Not only is steampunk trends infecting wardrobes but also music. I am a lover of all types of music and always appreciate it when an artist can crossover or recreate a genre. I like this particular video because it pays homage to some of my favorite hip hop songs.


Mr. B Gentleman Rapper- Chap Hop History

Here are a couple more artists I have found recently.

Abney Park- White Wedding


anonymous covering Avenged Sevenfold Bat Country

Monday, February 20, 2012

Mardi Gras- Steampunk Style

WOW! has it really been almost a month since I was on here?? Ughh Well, I will try to remedy that as I have lots to write about lately as well as a good many sewing projects on my agenda 'til the Phoenix Comic Con, Memorial Day Weekend.


This past Saturday was the 2nd annual Downtown Phoenix Mardi Gras Parade. My fellow cohorts in the Arizona Steampunk Society and I were invited to roll in it. A few of us put our noses to the grindstone for 3 weeks in preparation of floats, throws and a huge cthulu mascot. Because I was so busy on the parade prep my costume sort of went on the back burner till the last moment. Luckily I already had some pieces I was able to throw together. My favorite piece of my costume was the wind up key.


My steampunk wind up doll costume


The key was the very last piece of my outfit and I stumbled on its construction with fear and anticipation. Luckily my friend Noe, who is brilliant with design work, helped me with the correct proportions making my gear out of cardboard. I used a template for the teeth and it worked out perfectly in sync. 

Next, I needed to make my key out of cardboard; which I didn't actually measure spot on but I think it came out pretty good, I laid out two bowls side by side and inverted them so the rims laid on the cardboard. I traced the bowls onto the cardboard. I did the same in the center with a set of smaller bowls, cut everything out in one piece. I made a slit into the center of the gear so the key would slide in. At the bottom of the key I folded the rectangular (bottom) so it went back and forth, I slid that part into the slot on the gear then cut that portion in half. I hot glued the two pieces like wings to give the key support and stay in place. 


For the final addition, I looped white jewelry wire through the slot so I could attach it to my back and shoulders incognito.

Now, I have a wind up key and gear for those times when you never know you will need one!

Tuesday, January 24, 2012

It's Getting Hot In Here

Yeah- that is all the words I know to that song. Is that even the name of the song? I don't know. But I thought it was a clever title. One of the reasons I like writing this blog- I can be creative and whimsy and sometimes snarky. But let me ask you...what do you do when you want to blog but can't think of anything and you made a deal with yourself you would write EVERY day??? I still don't know the answer but I thought in place of words I would entertain with videos!


Here are some really great videos of beautiful girls getting all steamed up!


I love the whole process of make up and hair for this exotic aviator


I didn't know there was an actual clothing line called Steampunk Couture. This video is for their 2011 line and it is all handmade- 


And I will leave you my reader with some music. A band I just got familiar with called The Melting Pot. I like the song and the video is ok- don't know what "Fred and Ginger" style dancing have to do with Steampunk but; for a glimpse, I thought I saw Vampira!

Sunday, January 22, 2012

All On A Mardi Gras Day

Mardi Gras is exactly one month away this year. Me and my friends are usually knee deep in tulle and feathers in preparation of our costumes for either; our participation in various parades or our Mardi Gras day costume. This year I won't be in New Orleans to participate in parades or celebrate the day; however there is a possibility of participation in a Mardi Gras parade in Phoneix this year.

I am in the Arizona Steampunk Society and promoters of the Mardi Gras parade has invited the society to participate. I would like to say that everyone jumped at the moment of hearing this news but- that wasn't exactly the case. I have had bated breath wanting to know if we do participate if will be a theme or coordination of color. The one thing I do know is that there will be a steampunk influence.

I went ahead and started preparation of of a costume- tame as it will be in comparison to a costume for New Orleans Mardi Gras costume- a costume in steampunk style.

I chose fabrics in traditional Mardi Gras colors; green, purple and gold. I found some really great harlequin pattern fabric in cotton calico blended weight. I decided to make a Victorian inspired outfit using this Simplicity pattern.


Like I said above, I am using a cotton not a satin or taffeta like you see in the picture.


I am working on the bustier first and working the rest of the outfit later. Look at all these pieces I needed to cut out. For each pattern piece I had to cut out 2 of each layer; 2 of the front of the top, 2 pieces of fusible interfacing and 2 pieces of of the inside lining fabric (the green fabric).


The bustier also requires featherweight boning and a zipper. It is unusual for a typical bustier to have a zipper in place of corset laces or heavy hook and eye closures.

Since I am still in the preparation stage of this project I will have come back and give an update as my project progresses.

Thursday, January 19, 2012

What Not To Wear

Is this still a question of fashion faux pas? Stacy London is sooo annoying to me telling women their fashion choices are horrid. I, myself have an unusual sense of fashion and I know for a fact I would be a perfect target for her. She likes to tell everyone what to wear and how to wear it. I have noticed others too, in certain groups, like to set rules for what to and what not to wear.

As my profile states I am a nerdy girl - I was a drama geek; we used to wear trench coats and tons and tons of black plastic bracelets and we accepted each other while trading new and quirky fashion tips. As an adult I am finding that these types of groups are a little less accepting.

I may be getting ahead of myself here and speaking out of turn, but I am still learning about steampunk and its aesthetics. Sometimes I read about people making fun of other "cosplayers". Steampunk wardrobes and costumes usually have some sort of mechanical influence with cogs and gears attached. According to some...you just can't sew on some gears and cogs and call it steampunk...


I mean, come on; all newcomers need to start somewhere. Mentors are needed for newbies.

I was watching The Nerdist the other night and Chris and the panel were discussing how us geeks don't know everything geek/nerd and we don't have time to watch every Star Wars movie or Battlestar Galactica program and sadly enough...not everyone knows what a TARDIS is.

http://www.nerdist.com/podcast/nerdist/
The point I am trying to make here is that everyone can overlap their interests and they need some time to assimilate into the new environment. Not all of us did live action role playing- even us drama geeks.

BTW- TARDIS stands for time and dimension device in space! Now you know!


Wednesday, January 18, 2012

Back To Basics

I am back to square one.

I told myself I was going to write this blog everyday as a way to re-direct my focus and improve my work habits. So, here I am, starting from square one because I allowed myself to lose focus and let day slip away. Square one is an ok place to be-it is a place you know where to start:: step 1!

Since my blog is supposed to expose my reader to aspects of nerdy, geeky aspects of fashion and sewing, I decided to make a list of basic items you might want to start from square one if you are making a new costume or upgrading your existing cyberwear. These items are basics that I think are important to have for projects.

1. lots of colored thread, several sizes of sewing needles and at least one pair of sharpened scissors

2. variety of mechanical destash pieces: gears, cogs, mechanical clock works


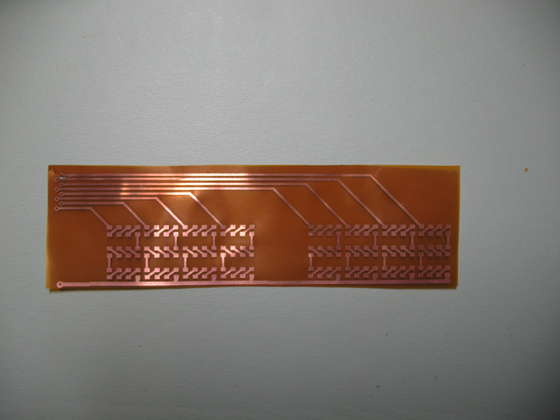
3. (new favorite item) sew in flexible circuits


4.various tools: seam ripper, needle nose pliers, point turner and presser, soldering iron, glue gun, grommet pliers and multiple temperature steam iron. And the last and most important

5. creativity

This is a good list of basic items to get you started on a new fantasy project. Here are a couple of pictures of hand made sci fi outfits using some of these items:

Monday, January 9, 2012

Fascinating!

If you say the word fascinator in casual conversation I think "royal wedding" will be first thing someone will connect it to.

The royal wedding of William and Kate is not the first time fascinators have been seen in public. I think it takes an event like this to take notice of something. Women have been wearing fascinators in previous eras only called a hat. Typically they are a headpiece with netting, chiffon or feathers on a base.


I love how fascinators have become a huge fashion piece for Steampunk attire. Now, before you go off and say you can just add gears or clock pieces to any hat and make it Steampunk; WRONG- (in my opinion). The best Steampunk fascinators I have seen don't always have a clock hand or cog. There are lots of great Etsy artisans who hock their wares - some even do custom orders.


Thursday, January 5, 2012

Bow Ties Are Cool

Are you tired of that phrase yet? What about Fezzes- Fez are cool? I, myself don't mind it at all and like the reminder of the first time I heard it and just how clever Matt Smith was saying it!


When the 11th doctor finished regenerating we find him sporting a tweed coat, All Saints layer boots and the smartest little bow tie. It is obvious, Matt Smith didn't introduce bow ties to fashion but he sure is rocking the look during the height of its resurgence. Before I go any further I must pay homage to Pee Wee and his trademarked red bow tie.


Paul Rubens AKA Pee Wee

I don't know if you noticed during the past Christmas season, but retail chain stores were displaying bow ties loud and proud- an array of every color, fabric and design. Prices ranged from the teens to $75.00 in some stores. It made my heart sink just a tiny bit see all the commercialism of the cutest accessory for men (in my opinion) because it was a project and new item I planned on adding to my Etsy shop. I kicked a rock or two for a minute and decided to just get over it and move on with my designs. 

I searched the internet for bow tie ideas. I already knew that I wanted my designs to be the old fashioned tie it yourself type. I found lots of how to videos and blogs and finally took a little from a few different places to come up with my design. I found my template on marthastewart.com. The template included two patterns; one a butterfly pattern and the second a straight, rectangular style. If you would like to modify the pattern you can make it into an arrow shape very easily.

When I started working on my ties it was around Halloween and I was sort of monitoring the trend for costumes and costume accessories.

The "Ringmaster" costume was one of the more popular outfits this year (according to my daughter). Most of the costumes I found were a combination of red and white with black and white stripes used in various ways. So I made a couple pieces for her with that color scheme. 

I also set out to make my first bow tie. If you read my blog from a few days ago - you will know that I have limited access to a variety of fabric. I did, however find some cool red and white striped fabric at my local Wal - Mart for only $2.97 a yard.

I made these cuffs out of scraps of the fabric. I wrapped a piece of fabric around my wrist and made sure I had a bit extra for hems. I hemmed each side of the cuff, sewed a casing down the middle of the cuff on the inside and added the elastic, again, only measuring how much by what is comfortable on my wrist. When I sewed the sides together I was done! One project down- now to tackle bow ties!


I picked up fabric here and there that I thought would work as a bow tie. I looked for funky and unusual colors and designs. The target customer I have in mind would appreciate a stylish bow tie in neon green or a design of clocks. I laid out my fabric which is exactly one yard if you are using stripes or a design because you need to keep the lines matched up. Next, I laid out my handmade template and cut out the pieces (which, there is total of 4). The last step before I began the actual sewing was lay out the pattern on PellonAfter all that cutting out- you sew a couple pieces together, leave center open turn inside out and use a blindstich to finish it off and that's it.

Tuesday, January 3, 2012

Bloomin' Awesome!

First and foremost- please forgive the picture quality. I didn't pay attention to the lack of lighting on some pictures until it was too late and I was already full speed in my project.

Now- Allons-y!

My whole life I have been drawn to subcultures- watching old Star Trek and Doctor Who episodes when I was a kid, playing D&D in high school and-all the while sampling various "not top 40s" mainstream music and fashion; and, yes I collected a toy or two...or three. Before you start judging - you just wait! that NIB Queen Amidala Episode I doll is going to be worth $25.00 someday!!!

So here we are, living in the 2000s and there has been a resurgence of fantasy / cosplay / subculture groups, activities and such popping up all over. Steampunk is one of the groups making mainstream noise and getting noticed more and more (i.e) Justin Bieber and his Macy's window displays and the most recent 2012 Rose Bowl Parade featuring a huge mechanical device- all done up in roses of course.

Steampunk is more than its mechanical gears and goggles. The fashion and wardrobe play a huge part in the cosplay scene. The attire can be almost anything ranging from Victorian dresses and bonnets for women and waist coats and stove pipe hats for men, or; an apocalyptic sci-fi alien look complete with ray guns (made from Nerf toys and painted bronze). These items are not easily found and off the rack to purchase immediately. Most people make their own outfits or may commission someone else with sewing skills; in the case of the more intricate item. One item of clothing getting a lot of buzz lately is bloomers. Yeah, I said bloomers. So I set out to make a pair. My project took about 2 1/2 hours with items costing less than $4.00.

First of all I purchased a pair of pajama pants at Goodwill for $1.49. The pair I chose has an elastic waist band with pretty grosgrain ribbon and the sweetest calico print.

Second, I laid out the pants and measured the desired length. I cut off the bottom part of the leg and saved the piece for later use. I 
then hemmed the bottoms with a 3/4" seam.


Third, I rummaged through my notions of ribbon, bias tape and lace and although nothing matched the material I decided to use a soft yellow colored lace and sewed the 2" trim around the bottom of the hem.

Once both legs of the bloomers had been hemmed and trimmed with lace, I began the more challenging part of the project. I couldn't decide if I wanted to use a casing and simply slip the elastic through or use a "sew on" approach that gathers the elastic directly to the fabric. I chose the latter.

Fourth, I measured the elastic around the part of my leg I wanted it to go and tightened it just a bit- so it will keep its shape but not be too tight. Now, the hard part began. I secured the end of the elastic to the inner seam so it was anchored. I proceeded to sew the elastic to the fabric by pulling the elastic as far as it will expand. Eventually I made it around to where I began and secured the elastic with a backstitch.

Fifth and final step- I chose yet, another color of ribbon that did not match any other colors on the bloomers and made a tiny little bow, placed it on the bottom of the leg at the ruffled section and secured it with a tiny, tiny safety pin. Et, voila! a brand new pair of bloomers; upcycled from a pair of pajama pants! I love the mismatched patterns and colors. I consider them more whimsical and Alice in Wonderland style but as a rule, an easy way to "steampunk" an item is just soak it in big pot of tea for several hours!

Sunday, January 1, 2012

Happy New Year! 2012

Hello! and welcome to my first blog for the new year "resolutions". As you can see from the archives, it has been over 2 years since I sat in front of this blog screen to type.
Resolutions and the idea of one doesn't actually sit well with me. I feel pressure for perfection and not having enough tools to modify a resolution yet still stay within the original parameters of the resolution. So, I get nervous, my perfectionism starts to take over the resolution/project and then it gets put on the back burner. Next thing you know it it holiday time again and I remember that project is still on the back burner collecting dust, and BAM it is the new year again and time to make those silly- ineffective resolutions- so I ask, why?
So, on this day; the first of January, 2012:
I won't resolve to write on my blog everyday; but will share new activity in my life in regard to my shop and sewing projects without looking for perfection or worrying if I am keeping within guidelines. I will not limit myself. I will have fun and be silly and not take myself or my work too seriously! Most important, I put my perfectionism and nervousness on the back burner to sit until I feel like I have eliminated those flaws from my life. A flaw that can hinder my creativity for merely being afraid of failure.
Bottom line is; I will not pressure myself or set hard to reach goals. I will continue to work on my Etsy shop and make more and more friends and network there. I will make find new and exciting projects that stimulate me and keep my mind busy so they do not get put on the back burner- I am going to have a great year.
Wow- that sounds like a LOT of resolutions, don't it!