Showing posts with label sewing. Show all posts

Monday, February 20, 2012

Mardi Gras- Steampunk Style

WOW! has it really been almost a month since I was on here?? Ughh Well, I will try to remedy that as I have lots to write about lately as well as a good many sewing projects on my agenda 'til the Phoenix Comic Con, Memorial Day Weekend.


This past Saturday was the 2nd annual Downtown Phoenix Mardi Gras Parade. My fellow cohorts in the Arizona Steampunk Society and I were invited to roll in it. A few of us put our noses to the grindstone for 3 weeks in preparation of floats, throws and a huge cthulu mascot. Because I was so busy on the parade prep my costume sort of went on the back burner till the last moment. Luckily I already had some pieces I was able to throw together. My favorite piece of my costume was the wind up key.


My steampunk wind up doll costume


The key was the very last piece of my outfit and I stumbled on its construction with fear and anticipation. Luckily my friend Noe, who is brilliant with design work, helped me with the correct proportions making my gear out of cardboard. I used a template for the teeth and it worked out perfectly in sync. 

Next, I needed to make my key out of cardboard; which I didn't actually measure spot on but I think it came out pretty good, I laid out two bowls side by side and inverted them so the rims laid on the cardboard. I traced the bowls onto the cardboard. I did the same in the center with a set of smaller bowls, cut everything out in one piece. I made a slit into the center of the gear so the key would slide in. At the bottom of the key I folded the rectangular (bottom) so it went back and forth, I slid that part into the slot on the gear then cut that portion in half. I hot glued the two pieces like wings to give the key support and stay in place. 


For the final addition, I looped white jewelry wire through the slot so I could attach it to my back and shoulders incognito.

Now, I have a wind up key and gear for those times when you never know you will need one!

Wednesday, January 18, 2012

Wear Your Heart On Your Sleeve


With Valentine's Day coming up in less than a month I thought I would do some pre-Valentine's wardrobe prep. Most of us girls look forward to this day with anticipation . This is one of those days that retailers take advantage of consumers selling the concept of love and romance. If I am like most girls, we look forward to dressing up and having a night on the town with our sweetie.

When I was in high school I was on an allowance that didn't always allow me extras for special occasions like Homecoming dances or white glove parties. I felt lucky I had learned how to sew at a very early age. I used my allowance to buy fabric and patterns to make the expensive fancy dresses for these special nights.

I made a few poor choices when combining pattern to fabric. I didn't always pay attention to the fabric recommendations on the label. I learned the hard way.

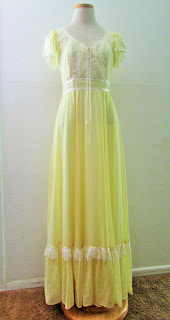
In the 70s and 80s Gunne Sax clothing was rather popular. 
 Vintage 1970's Cotton Gunne Sax Dress
1970's Original Gunne Sax Coton and Lace Dress

Typically, the Gunne Sax styled dresses were made of cottons and calicos and trimmed in thin satin ribbon and lace. The Gunne Sax pattern I chose was a very 80s styled dress, big billowy sleeves and all.


I picked out a pink taffeta fabric, similar to the fabrics of special occasion dresses I saw in the stores at the mall. I was very excited to embark on my sewing project.

The laying out of the pattern, cutting and preparing to sew was the easy part. Let me first say, that taking on a Gunne Sax dress is ambitious. The dress contains many pieces, many ruffles and many tiny buttons holes. Things were going pretty good at the start, but once I got to the bottom ruffle(which was approximately 2 yards all on its own) I began having difficulty. The taffeta fabric I thought would make me a Cinderella type gown was letting me down. The edges of the fabric began fraying and I had to double stitch seams, which were possibly going to open once I was wearing it. The double seams worked but they did not solve the overall problem. There was also a problem trying to create tiny little loops for buttons down the front of the bodice, ugh!

I spent hours and hours on the dress- perhaps a good week and half of hours at night (after all my homework was done of course) prior to the dance- I even remember doing last minute stitching on the dress just a few hours before wearing it.

Here is the end result and yours truly at 15

Valentine's Day Dance 1983
I strongly suggest to you my readers to match your project to the proper fabric- There is a reason for the suggested fabrics. As you see in the photo- the end result was lovely and I had a lovely evening with my date; but unfortunately it did not store well and fraying continued and eventually it was given away.

I learned a lot from this project and think it helped me become a better seamstress.

Back To Basics

I am back to square one.

I told myself I was going to write this blog everyday as a way to re-direct my focus and improve my work habits. So, here I am, starting from square one because I allowed myself to lose focus and let day slip away. Square one is an ok place to be-it is a place you know where to start:: step 1!

Since my blog is supposed to expose my reader to aspects of nerdy, geeky aspects of fashion and sewing, I decided to make a list of basic items you might want to start from square one if you are making a new costume or upgrading your existing cyberwear. These items are basics that I think are important to have for projects.

1. lots of colored thread, several sizes of sewing needles and at least one pair of sharpened scissors

2. variety of mechanical destash pieces: gears, cogs, mechanical clock works


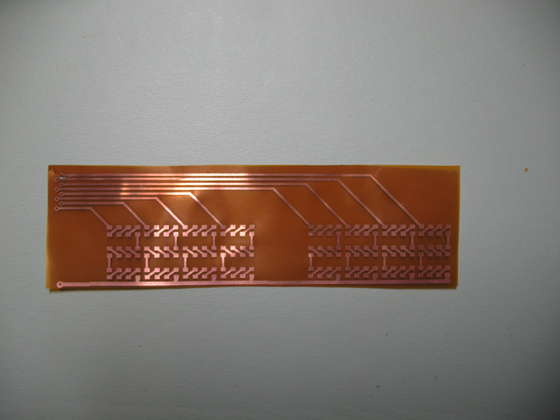
3. (new favorite item) sew in flexible circuits


4.various tools: seam ripper, needle nose pliers, point turner and presser, soldering iron, glue gun, grommet pliers and multiple temperature steam iron. And the last and most important

5. creativity

This is a good list of basic items to get you started on a new fantasy project. Here are a couple of pictures of hand made sci fi outfits using some of these items:

Sunday, January 15, 2012

A Is For Apron

I have a book by the same name, "A Is For Apron". If you are looking for inspiration to make funky and unusual aprons, I recommend this book.

I have always loved aprons, especially vintage aprons from the 40s. I do not come across aprons that old very often and especially ones that are not badly stained or badly frayed. One of the reasons I love doing what I do is the search- the love of the hunt. Lately, I have had a bit more luck finding some aprons in good condition but still not finding one from the 40s.

For a few years now pattern makers have been reissuing patterns of vintage styles with modern sizes (thank goodness! I wear a vintage size 18 1/2 to 20 and anything in those sizes are hard to find!). I have a couple of the reissue patterns that McCall's produced. I stole this photo from another blog (I hope the writer doesn't mind).

Circa 1940s

I own this picture and pattern AND I actually have an apron exactly like the pink check in the picture.

circa 1950s

This McCall's pattern 3979, is the one I own and use often. 


I made this apron (style B) from out of print Elvis fabric. 

Tuesday, January 10, 2012

Patterns of Design

Patterns of Design...It just has a sophisticated ring to it. So...engineering-esc.

So much for my sophisticated style of writing, making up words. But, I am not here to blog about writing or engineering. I would like to talk about patterns and pattern making.

I did some looking up stuff (googling) as they call it nowadays...and found out that American pattern making was completely different than that of European sewing. There was no marketplace for homemakers for clothing; with the extremely rich the exception; so a way in which the homemaker could expand their wardrobe was necessary. In 1860, Mr. and Mrs. William Jennings Demorest made fashion patterns for home seamstresses. They sold a magazine, what I would call a catalog, with 100s of different patterns. The patterns were rudimentary for the most part; mostly made in only one size and did not come with instructions.


When I was a kid I used to love to go to the fabric store with my mom. She did a lot of home sewing and most of my outfits were homemade. I loved to sit at desks with the big, ginormus pattern catalogs .Flipping those pages were so fun! Even more fun was opening the big, ginormus pattern file cabinets and searching for my pattern number- sort of like treasure hunting!


I have been altering patterns for awhile now trying to get just the right look- because a pattern for what I want doesn't really exist. I find this really rewarding making my own OOAK piece of clothing. If you read my profile- you will know that I search for vintage patterns and notions. I did a bit of shopping at a local Goodwill tonight and came across a curious pattern.


If you are younger than 30 and know who Mr. Blackwell is than I salute your fashion history knowledge. For those of you who DON'T know who he is; he is most known for being a fashion critic and at the end of every year he would create his "worst dressed list". In the '50s he had his own boutique "House of Blackwell", his own designer clothing line and pattern designs AND he dressed the stars! Yvonne Di Carlo (Lily Munster), Jayne Mansfield and Nancy Reagan just to name a few. So, I thought this was a great find for 69 cents and uncut! A cool piece of fashion history.

Thursday, January 5, 2012

Bow Ties Are Cool

Are you tired of that phrase yet? What about Fezzes- Fez are cool? I, myself don't mind it at all and like the reminder of the first time I heard it and just how clever Matt Smith was saying it!


When the 11th doctor finished regenerating we find him sporting a tweed coat, All Saints layer boots and the smartest little bow tie. It is obvious, Matt Smith didn't introduce bow ties to fashion but he sure is rocking the look during the height of its resurgence. Before I go any further I must pay homage to Pee Wee and his trademarked red bow tie.


Paul Rubens AKA Pee Wee

I don't know if you noticed during the past Christmas season, but retail chain stores were displaying bow ties loud and proud- an array of every color, fabric and design. Prices ranged from the teens to $75.00 in some stores. It made my heart sink just a tiny bit see all the commercialism of the cutest accessory for men (in my opinion) because it was a project and new item I planned on adding to my Etsy shop. I kicked a rock or two for a minute and decided to just get over it and move on with my designs. 

I searched the internet for bow tie ideas. I already knew that I wanted my designs to be the old fashioned tie it yourself type. I found lots of how to videos and blogs and finally took a little from a few different places to come up with my design. I found my template on marthastewart.com. The template included two patterns; one a butterfly pattern and the second a straight, rectangular style. If you would like to modify the pattern you can make it into an arrow shape very easily.

When I started working on my ties it was around Halloween and I was sort of monitoring the trend for costumes and costume accessories.

The "Ringmaster" costume was one of the more popular outfits this year (according to my daughter). Most of the costumes I found were a combination of red and white with black and white stripes used in various ways. So I made a couple pieces for her with that color scheme. 

I also set out to make my first bow tie. If you read my blog from a few days ago - you will know that I have limited access to a variety of fabric. I did, however find some cool red and white striped fabric at my local Wal - Mart for only $2.97 a yard.

I made these cuffs out of scraps of the fabric. I wrapped a piece of fabric around my wrist and made sure I had a bit extra for hems. I hemmed each side of the cuff, sewed a casing down the middle of the cuff on the inside and added the elastic, again, only measuring how much by what is comfortable on my wrist. When I sewed the sides together I was done! One project down- now to tackle bow ties!


I picked up fabric here and there that I thought would work as a bow tie. I looked for funky and unusual colors and designs. The target customer I have in mind would appreciate a stylish bow tie in neon green or a design of clocks. I laid out my fabric which is exactly one yard if you are using stripes or a design because you need to keep the lines matched up. Next, I laid out my handmade template and cut out the pieces (which, there is total of 4). The last step before I began the actual sewing was lay out the pattern on PellonAfter all that cutting out- you sew a couple pieces together, leave center open turn inside out and use a blindstich to finish it off and that's it.

Tuesday, January 3, 2012

Bloomin' Awesome!

First and foremost- please forgive the picture quality. I didn't pay attention to the lack of lighting on some pictures until it was too late and I was already full speed in my project.

Now- Allons-y!

My whole life I have been drawn to subcultures- watching old Star Trek and Doctor Who episodes when I was a kid, playing D&D in high school and-all the while sampling various "not top 40s" mainstream music and fashion; and, yes I collected a toy or two...or three. Before you start judging - you just wait! that NIB Queen Amidala Episode I doll is going to be worth $25.00 someday!!!

So here we are, living in the 2000s and there has been a resurgence of fantasy / cosplay / subculture groups, activities and such popping up all over. Steampunk is one of the groups making mainstream noise and getting noticed more and more (i.e) Justin Bieber and his Macy's window displays and the most recent 2012 Rose Bowl Parade featuring a huge mechanical device- all done up in roses of course.

Steampunk is more than its mechanical gears and goggles. The fashion and wardrobe play a huge part in the cosplay scene. The attire can be almost anything ranging from Victorian dresses and bonnets for women and waist coats and stove pipe hats for men, or; an apocalyptic sci-fi alien look complete with ray guns (made from Nerf toys and painted bronze). These items are not easily found and off the rack to purchase immediately. Most people make their own outfits or may commission someone else with sewing skills; in the case of the more intricate item. One item of clothing getting a lot of buzz lately is bloomers. Yeah, I said bloomers. So I set out to make a pair. My project took about 2 1/2 hours with items costing less than $4.00.

First of all I purchased a pair of pajama pants at Goodwill for $1.49. The pair I chose has an elastic waist band with pretty grosgrain ribbon and the sweetest calico print.

Second, I laid out the pants and measured the desired length. I cut off the bottom part of the leg and saved the piece for later use. I 
then hemmed the bottoms with a 3/4" seam.


Third, I rummaged through my notions of ribbon, bias tape and lace and although nothing matched the material I decided to use a soft yellow colored lace and sewed the 2" trim around the bottom of the hem.

Once both legs of the bloomers had been hemmed and trimmed with lace, I began the more challenging part of the project. I couldn't decide if I wanted to use a casing and simply slip the elastic through or use a "sew on" approach that gathers the elastic directly to the fabric. I chose the latter.

Fourth, I measured the elastic around the part of my leg I wanted it to go and tightened it just a bit- so it will keep its shape but not be too tight. Now, the hard part began. I secured the end of the elastic to the inner seam so it was anchored. I proceeded to sew the elastic to the fabric by pulling the elastic as far as it will expand. Eventually I made it around to where I began and secured the elastic with a backstitch.

Fifth and final step- I chose yet, another color of ribbon that did not match any other colors on the bloomers and made a tiny little bow, placed it on the bottom of the leg at the ruffled section and secured it with a tiny, tiny safety pin. Et, voila! a brand new pair of bloomers; upcycled from a pair of pajama pants! I love the mismatched patterns and colors. I consider them more whimsical and Alice in Wonderland style but as a rule, an easy way to "steampunk" an item is just soak it in big pot of tea for several hours!

Monday, January 2, 2012

Find That Fabric!

I have been accumulating patterns over the past year for many of my projects. One thing I like to do is take a part of one pattern and combine it with part of another to get the desired look I am after. I know this is not a new idea at all but I like to think that it is and after all is said and done I have an OOAK finished product. http://dictionary.reference.com/browse/one-of-a-kind  (Even after all these years on the internet and learning how to chat and text with less and less symbols; I still had to look this abbreviation up!)

After I have my project drafted by its design and color; I pursue the fabric. I don't know if anyone else ishaving a similar problem finding fabric and notions but all of the  fabric stores in my area are closing up. Blame it on the economy, blame it on lack of interest in the old fashioned art of sewing but needless to say- I can hardly find any fabric OR decent fabric in my neighborhood. Hancock Fabrics and Jo Ann stores were the 2 that I shopped at, AT least bi-monthly and during holiday season- almost weekly. Sad to say they are both gone and the only other fabric store close by is a remnants store which, in my opinion, is getting worse and worse each time I go in.

You know the saying "necessity is the mother of invention"? I have had to use it and become creative in ways to find fabric. My solution: sheets! Yes, I said sheets. Why you ask? Well first of all the twin size sheet is almost 4 yards of material, second you can find all colors, deigns, weights of cotton and or sizes (for more material). Third, and my favorite reason, you can buy sheets at thrift stores for mere pennies! There are thrift stores in my neighborhood that have half off day sales so you can get a complete set of sheets including pillowcases, flat and fitted sheets for less than $3.00!

I have been using sheets and pillowcases for some of my projects lately. I prefer the vintage percale sheets because they are a 50/50 blend of cotton and polyester and tend to wash and dry well without ironing or worry of shrinkage. I made this apron with a vintage Strawberry Shortcake pillowcase. It cost me $1.49 at Goodwill. The coordinating fabric was also found at another local thrift store as a fabric remnant for about $1.00. I already had the pink ric rac trim; so after about 2 hours of my time and a bobbin full of thread this apron cost me less than $4.00!

I have also found other ways to acquire material for my projects. I have been scouring websites day and night for Doctor Who themed fabric. I thought it had been commercially manufactured but evidently there never was any. I did find Doctor Who "inspired" fabric on this really cool website called Spoonflower.com      http://www.spoonflower.com/welcome It allows you to offer up a design for fabric and you can have it made and you can sell it to others in fat quarters, yards or bolts. However, because of the customization the by the yard price is rather steep, sometimes in the $30/per range.

Sunday, January 1, 2012

Happy New Year! 2012

Hello! and welcome to my first blog for the new year "resolutions". As you can see from the archives, it has been over 2 years since I sat in front of this blog screen to type.
Resolutions and the idea of one doesn't actually sit well with me. I feel pressure for perfection and not having enough tools to modify a resolution yet still stay within the original parameters of the resolution. So, I get nervous, my perfectionism starts to take over the resolution/project and then it gets put on the back burner. Next thing you know it it holiday time again and I remember that project is still on the back burner collecting dust, and BAM it is the new year again and time to make those silly- ineffective resolutions- so I ask, why?
So, on this day; the first of January, 2012:
I won't resolve to write on my blog everyday; but will share new activity in my life in regard to my shop and sewing projects without looking for perfection or worrying if I am keeping within guidelines. I will not limit myself. I will have fun and be silly and not take myself or my work too seriously! Most important, I put my perfectionism and nervousness on the back burner to sit until I feel like I have eliminated those flaws from my life. A flaw that can hinder my creativity for merely being afraid of failure.
Bottom line is; I will not pressure myself or set hard to reach goals. I will continue to work on my Etsy shop and make more and more friends and network there. I will make find new and exciting projects that stimulate me and keep my mind busy so they do not get put on the back burner- I am going to have a great year.
Wow- that sounds like a LOT of resolutions, don't it!

Monday, July 5, 2010

T Shirt USA


So, I have been following this girl's "New Dress A Day" blog online for a few weeks now; http://newdressaday.wordpress.com/ and it has revived a favorite sewing project of mine- transforming t shirts. I know this idea is not new and a lot of people have paved the way in the fashion industry by distressing, disassembling, deconstructing and safety pinning t shirts. Practically every designer in the industry has their own signature t shirt and style. I just thought it would be fun to write a blog about it and let ya'll know how I look at t shirts. I really am a fan of wearing t shirts but with my vertically challenged height and short torso, t shirts make me looked boxed in and frumpy- not the look I am usually going for.

When I see I t shirt I see potential. I see it as a piece of raw material just begging to be shaped into a skirt, a blouse, a pillow or even a rug. I don't think anything I do to a t shirt is extraordinary or really cutting edge but it is fun and gives me another way to express myself through clothing. Why, just the other night I had several comments on a t shirt I was wearing. Granted, the t shirt was noticed because it had my high school alma mater mascot on it; but the only alteration I made to the shirt was cutting off the collar. T shirt transformations can be as simple as that.

I found a really great craft book called T Shirt Generation. It is a fun step-by-step instruction manual on transforming t shirts. I often use that book for inspiration.

One of the last t shirt projects I did was during the past Superbowl. I could have worn any one of the number of New Orleans and or Saints t shirts in my collection but I really wanted something special; I mean it isn't every year the Saints are in the Superbowl!

(1) I started out with a large t shirt with the Saints graphics and logo.
(2) I cut off the sleeves and the collar.
(3) I cut the shirt down the middle of the back and then made several equal cuts in the material on both side so that they were strips that could be tied in the middle this was an easy way to cinch the t shirt around the waist thus removing any chance of frumpiness.
(4) I cut the front of the shirt down the middle as well and again in the center giving me four (triangles). I re-stitched the seams to create an empire like bodice and ruching. The bottom of the center seam was left open.
Now for the final flourish!
(5) I cut about two (2) inches down the center at the neck then tucked the corners inside and pinned them. Next, I took two (2) pieces of gold elastic and gathered the sleeves at the collarbone and tied a bow on each shoulder.

Et voila'! My very own custom made New Orleans Saints t shirt.